Using Outlook/Exchange for calendar only, while keeping e-mail in Thunderbird
Introduction
Wake Forest University offers the Exchange server for sharing calendars. This shared calendar can be accessed through Outlook or through the web interface at https://mobileumail.wfu.edu/exchange/.
Many of us may want to take advantage of the shared calendar without using Outlook for e-mail. It is easy to do and works great.
I much prefer Thunderbird for e-mail, with its better spam filtering, better tools for prioritizing e-mail, and fewer limits on future mail client decisions. It is not hard to set up Thunderbird so that it continues to function as your client handling all your mail even after you have been set up in Exchange. The directions for doing so follow.
Please note that the following instructions will work to restore your Thunderbird capability even if you have gone through the class to convert to Outlook/Exchange. (For advanced users who care about what is going on, see Background.)
Setting up your Exchange account
You cannot set up your Exchange account yourself. Call the help desk or ask your ITS to create your Exchange account. Once this is set up, you can check to see if it is working by logging on to https://mobileumail.wfu.edu/exchange with your usual university login and password.
Configuring Thunderbird
Overview
There are only three things you have to do to have Thunderbird handle all your mail after getting an Exchange account:
- Add the Exchange account to Thunderbird.
- Optionally, merge e-mail from Exchange users with e-mail from other users.
- If you previously set up forwarding of external mail to your Exchange account, cancel that.
Add the Exchange account to Thunderbird
Your Exchange account is just another e-mail account from Thunderbird's perspective. Here is how to set it up.
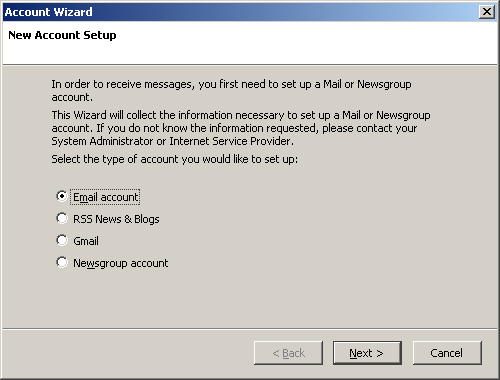
In Thunderbird, choose File > New > Account. On the New Account Setup page that appears, choose "Email account".
Click Next.
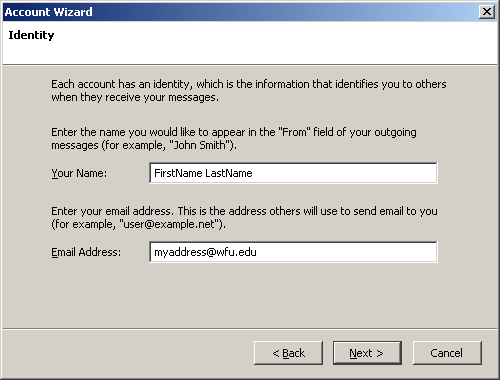
On the Identity page, enter your name and e-mail address.
Click Next.
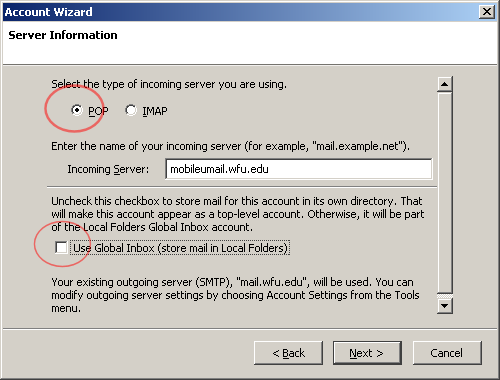
On the Server Information page, choose "Pop" and enter "moblieumail.wfu.edu" as the Incoming server address.
Be sure the "Use Global Inbox" check box is unchecked.
Click Next.
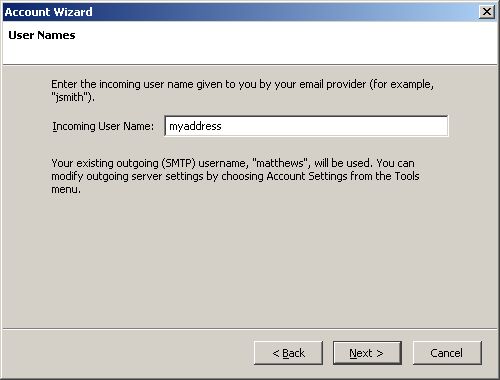
On the User Names page, enter your standard Wake Forest login as the Incoming User Name.
Click Next.
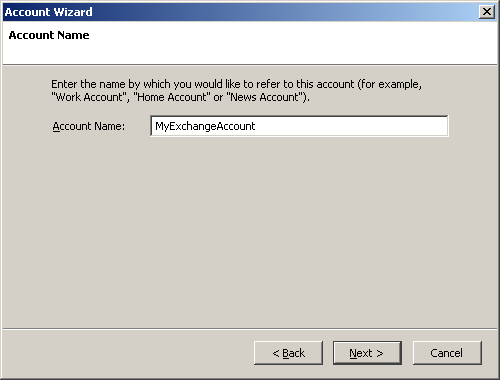
On the Account Name page, enter an identifier such as MyExchangeAccount as the name of this account.
Click Next.
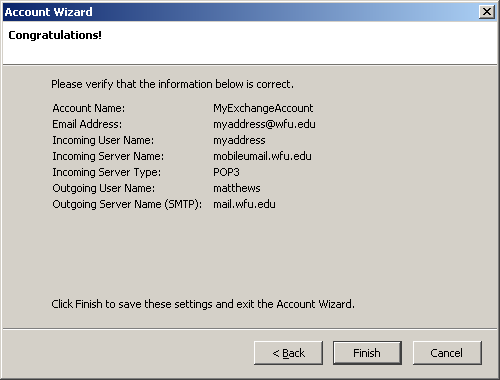
Thunderbird will now begin receiving Exchange e-mail.
At this point, all your Exchange e-mail will be delivered to the new account you just set up. This means that calendar notifications and mail from on-campus Exchange users will go to the new address, while all mail from the on-campus community not on Exchange and from the outside world will be delivered to your original e-mail account.
Next you need to configure Thunderbird to save all your e-mail in the same Inbox you have always used.
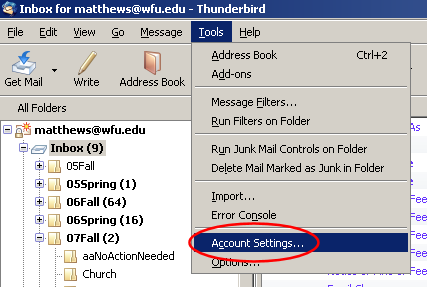
In Thunderbird, choosed Tools > Account Settings. You should see your original mail account and the account you just created for the Exchange server. Shown at right is my Exchange account, which I named ExchangeMatthews in Thunderbird.
If you do not see the options beneath your new account, click on the "+" next to the account name. Now you should see several options, including "Server Settings".
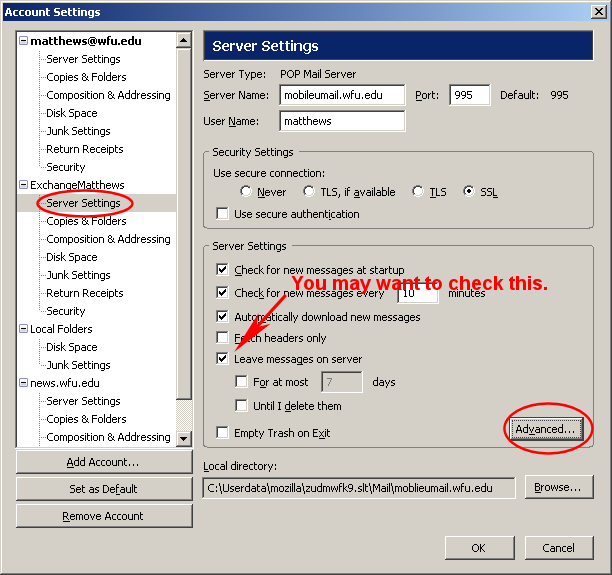
Choose "Server Settings.
If you want to be able to check Exchange messages in Outlook, too, check "Leave messages on server."
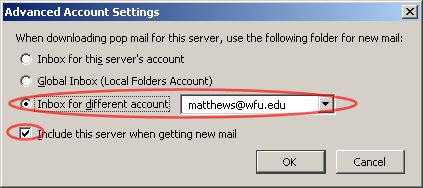
Click on "Advanced".
Choose "Inbox for different account" and select your original Inbox. Mine is called "matthews@wfu.edu".
Check "Include this server when getting new mail."
Click OK, and then OK again to return to Thunderbird.
What about forwarding?
If you participated in a university workshop on Outlook, it is likely you previously set up forwarding of your non-Exchange mail to your mail account.
The system we set up above will work with our without this forwarding turned on.
With forwarding in place, you will handle all of your vacation messaging, etc., through Outlook Web Access at https://mobileumail.wfu.edu/exchange/ under the Options button.
If you turn off forwarding of your non-Exchange generated mail, then you would have to change vacation messaging both at the above location and at https://wwws.wfu.edu/cgi-bin/cgiwrap/~root/login.pl. So the easiest approach is to forward all your e-mail to the Exchange server.
That's it!
Now all your notifications and mail from the Exchange server will come to the same Inbox you have always used.

Using your shared calendar
Accessing your calendar via Outlook Web Access
You can view your calendar, add appointments, and invite others to appointments via Outlook Web Access, https://mobileumail.wfu.edu/exchange/.
Responding to appointment requests
Exchange appointment requests will appear as e-mails in your inbox. Clicking on the link in the e-mail will send you to Outlook Web Access, where after logging in you will be able to accept or reject the request. If you accept, the appointment will automatically be added to your calendar.
Setting up Outlook with Exchange (if you have not already done so)
Important Note: If you went to the WFU class to move you to Outlook, all the following will already have been done. The only thing you need to do beyond the above instructions will be to cancel forwarding from your pop mail account via this page: https://wwws.wfu.edu/cgi-bin/cgiwrap/~root/login.pl.
Notice that to this point there has been no mention of Outlook in the setup instructions. You do not need to use Outlook to manage a shared calendar. You can just use Outlook Web Access as described above.
There are at least two reasons you might want to set up Outlook:
- You keep your calendar on a PDA. (Most PDAs will sync with Outlook.)
- You want access to your calendar on your personal computer even when you have no internet connection.
To get Outlook to talk to our Exchange server, do the following. (These instructions were borrowed from the WFU TechTalk page, Configuring Outlook for use with the Exchange Server.):
- Download RPC.reg to your desktop.
- Double click on the RPC.reg to install it.
- Download http://techtalk.wfu.edu/Standard_Load.PRF to your desktop.
- Double-click on Standard_Load.PRF.
- You will then see the alert box confirming that you want to import account settings. Click Yes.
- You will then be prompted to log in with your domain credentials, as pictured, below. For your user name, use deacnet\ followed by your username. For your password, type your network password. You will be prompted three times to log in. Each time, use the same user name and the same password.It can take up to four minutes between prompts. NOTE: During the authentication process, you may be asked to specify who you are. If so, select your name from the “Change to” box and click OK.
- After the third log in, wait a few minutes for the installation to complete. Once completed, your Outlook mailbox will open automatically.NOTE: When you open Outlook for the first time, you may be asked to set Outlook as your default e-mail and calendar client. Click Yes. (The next time you run Thunderbird, it should ask if you want it to be your default e-mail client. Choose Yes. That will make Thunderbird your default mail client but Outlook your default calendar client.)
You are done. Outlook should by default leave your messages on the server so that Thunderbird can pick them up.