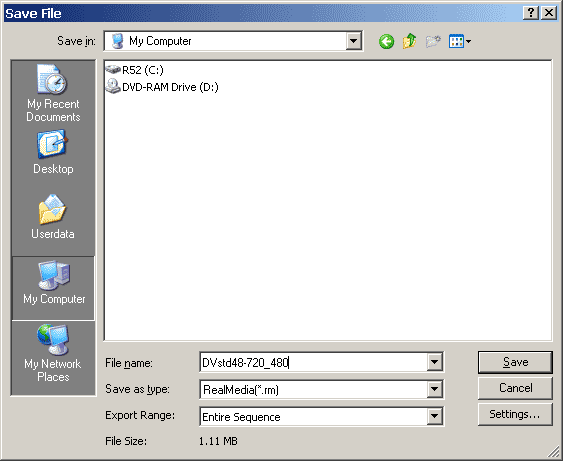
You only need to do this once to get the custom setting you want.
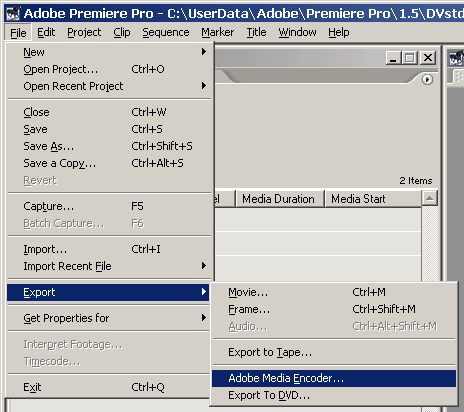
1. Choose Export | Adobe Media Encoder

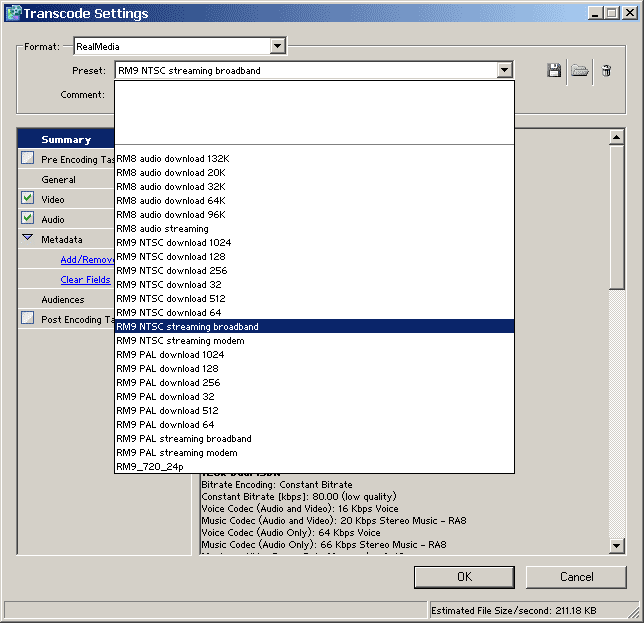
2. After you choose RealMedia from the Format, you can get a list of Preset. Choose RM9 NTSC streaming broadband.
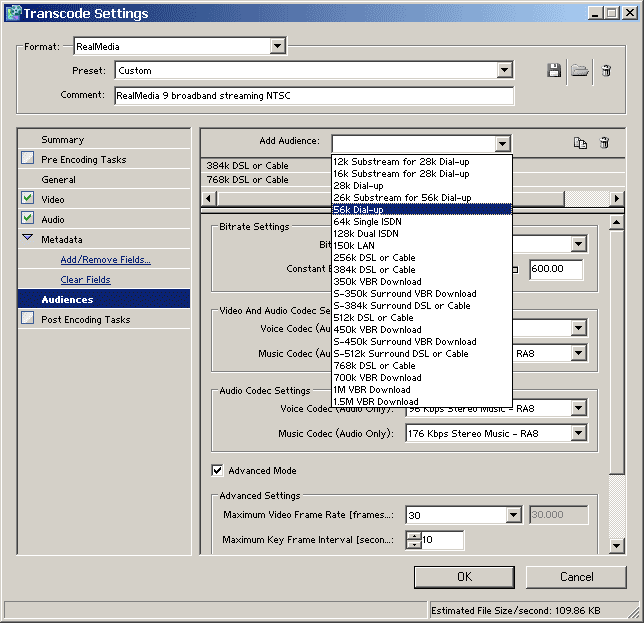
3. In the left pane, choose Audiences, click on 64k audience on the right top pane, click the Remove Audience button. Repeat for 128k, 150k, 256k, 512k.
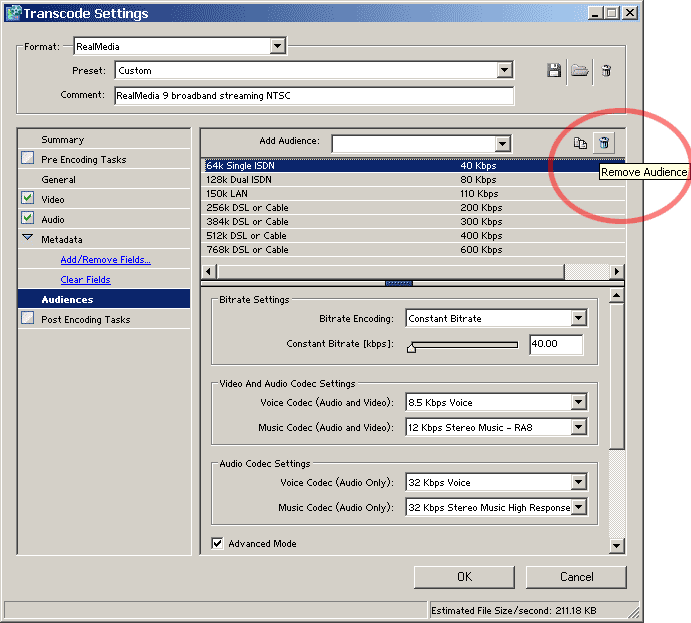
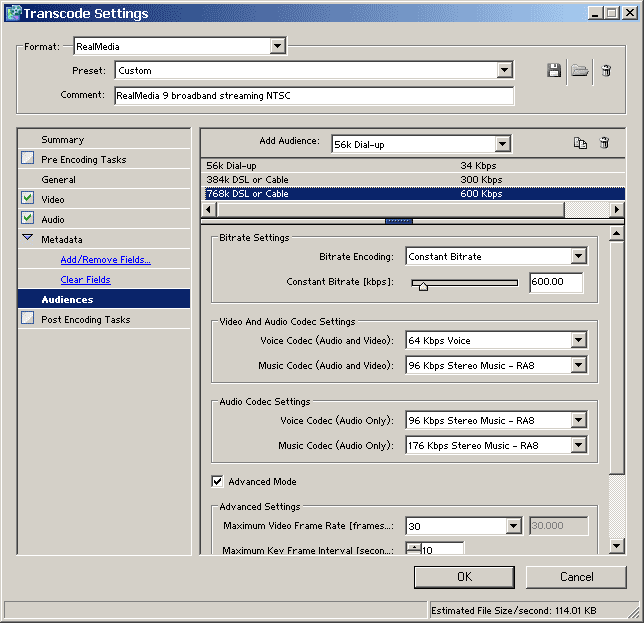
4. You should got 384k and 768k left. Choose 56k from the Add Audience
5. These should be what it looks like with 3 audiences
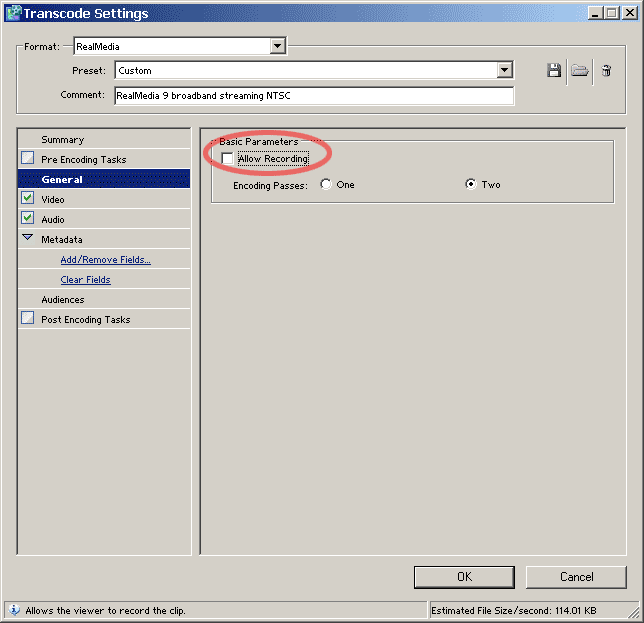
6. click on the general category on the left pane, uncheck Allow Recording on the right pane.
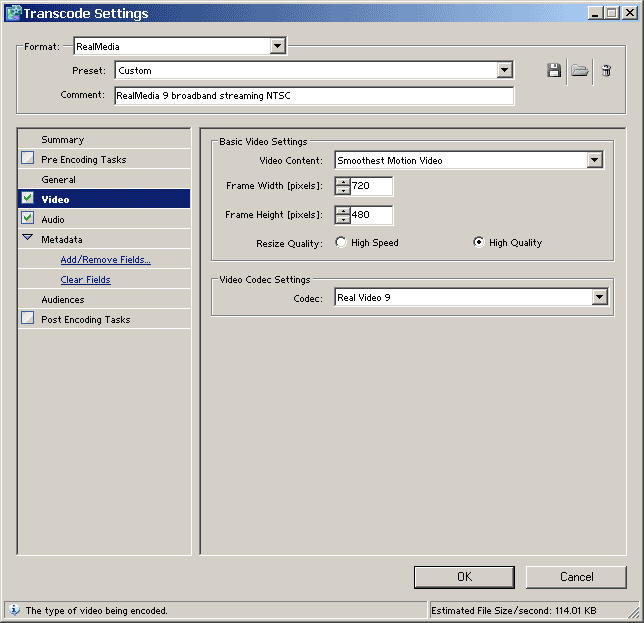
7. Click on the Video category on the left pane, change the width and height to 720x480 for 1:1 conversion from DV format.
Becareful not to choose anything like 640x480 or the default 320x240, they will result in a distorted video.
Sometimes, 720x480 is too large for the maximum 768k bitrate you set earlier. Some prefer using a slightly smaller size like 480x320 or 360x240. As long as you keep the 1.5 ratio, it will be fine. Alternatively, you can increase the maximum bitrate.
Some would also want to change other parameters like adding deinterlacing (pre-encoding task), or log the result (post-encoding task) etc.
8. Once you click OK, you will have to name this custom preset, use something meaningful.

9. Once you click OK after naming the custom preset, (it will remember all those, no need to do it again) you will be asked to name the .rm to save.
