
| Steps | Figure |
|
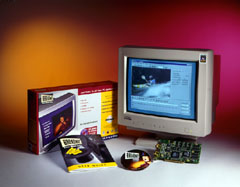
1. connect the video source phylab02b (next to the with Black monitor) is connected to the VCR. If you are using the camcorder, connect it to the RCA plug in the back of the VCR. |
|
|
2. Start Broadway it is on the desktop of phylab02b. It should be in AVI mode as indicated in the toolbar. If it is in MPEG mode, use the dropdown box to change it. |
|
|
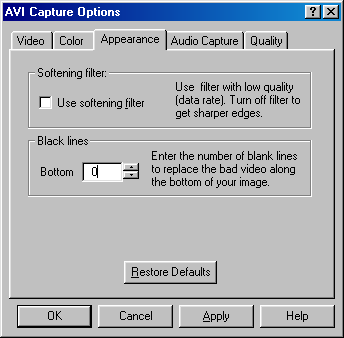
3. Options If you see black lines on the bottom of the video screen. Choose "Capture Options: from the pull-down menu. On the "Appearance" tab, enter the number of blank lines to "cover" the noise out. |
 |
|
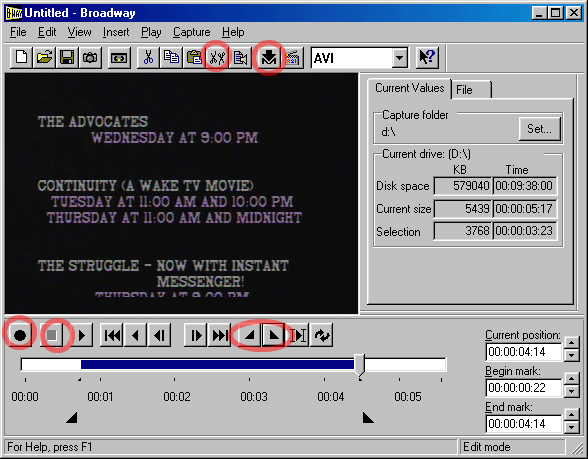
4. Record. Click the "Record (the circle)" button on the main screen approximately 5 seconds before where you want the capture to begin. There is a delay after you hit the button for the recording actually starts. Click "Stop (the square)" to end the capture. You can use the "in (left triangle)" "out (right triangle)" to mark the section you want. Then hit the "trim" button to cut out the unwanted sections.
|
 |
|
5. Save After your trimmed your video, you can save it as AVI files in case you need to edit it again. Click the "M" button then to compress it to MPEG-1 file. It takes 3x the video length to save it. A 1 min. video will take 3 min. to compress. Optional The AVI save/compress allows you to edit the video, but it takes longer. If you don't need to trim your video, you can capture directly to MPEG in real-time.
|
|
|
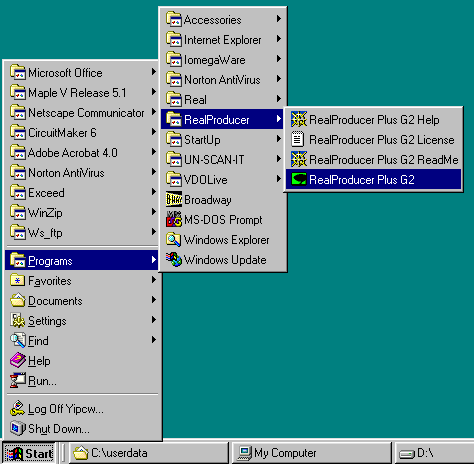
6. Convert to Real video start G2 Producer Plus from the start menu |
 |
|
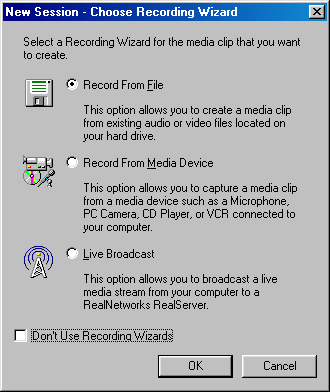
7. Create from file
|
 |
|
8. select AVI or MPG file
|
(minor error in illustration - there is no D: drive) |
|
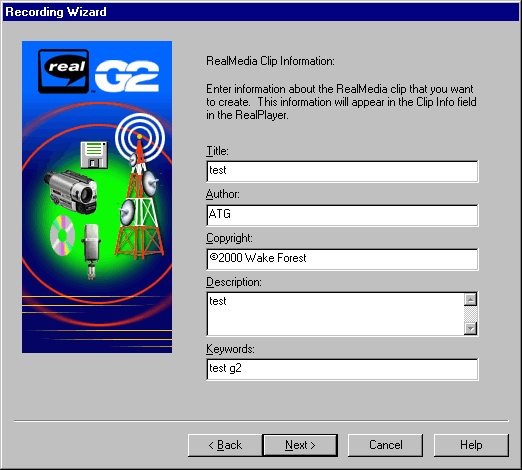
9. Enter clip info
|
 |
|
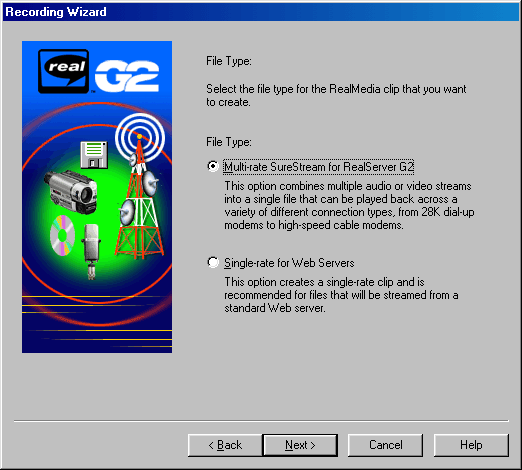
10. Choose multiple rate
|
 |
|
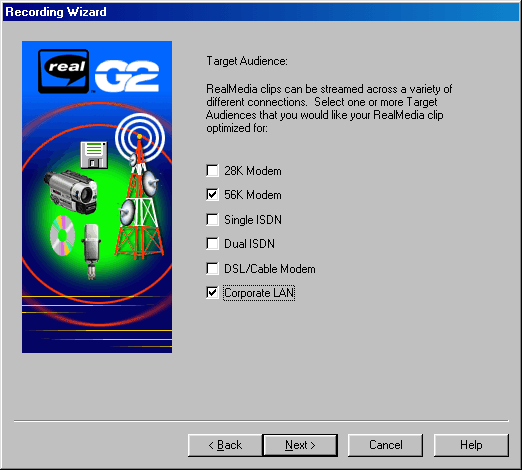
11. Choose 56K modem and Corporate LAN (Note: The Corprate LAN on phylab02a is customized to 1000Kbps instead of the default 150Kbps) |
 |
|
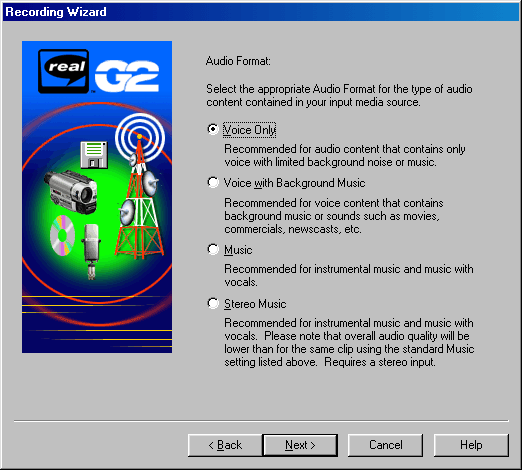
12. Choose the type of audio.
|
 |
|
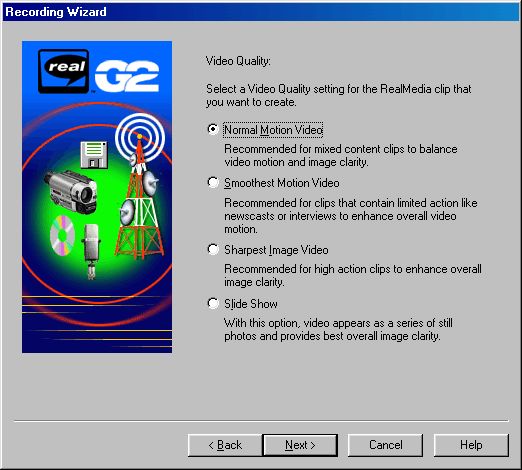
13. Choose the type of video.
|
 |
|
14. Choose output filename.
|
(minor error in illustration - there is no D: drive) |
|
16. Summary
|
(minor error in illustration - there is no D: drive) |
|
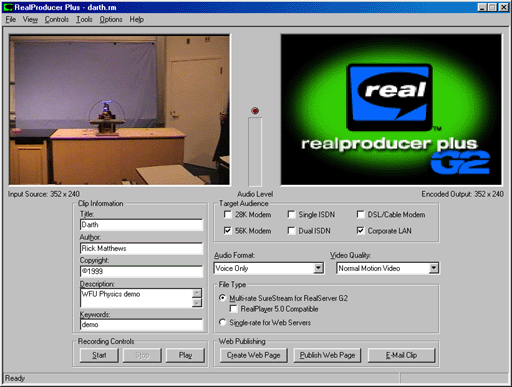
17. Back to main screen.
|
 |
|
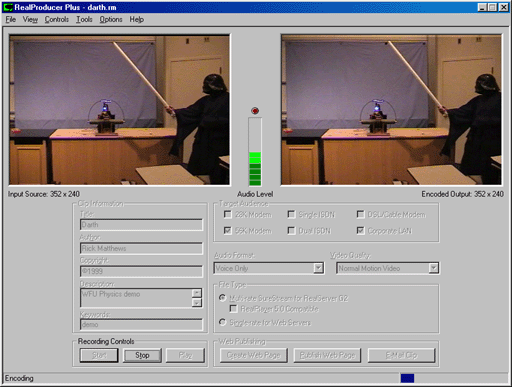
18. Click Start. You will get a summary when the encoding is done. |
 |
|
19. Cleanup. When the encoding is done, move your files to your ThinkPad, webpages, and/or CDR. delete all the work files on D: |
|
|
20. copy files to video servers Mediahawk (MPEG 1 and 2) and real (Real server) |
see yip for this |
|
21. Make links from web pages
|
see yip for this |
Data Translation Broadway http://www.datx.com/broadway/products.htm