Last Update : October 7, 2003
00. Define Source & Target
01 Get the analog video into digital form
02 Transfer the digital form to the computer
02.1 analog -> DV-AVI or MPEG file
02.2 miniDV -> Firewire -> DV file (AVI format)
02.3 DVD+/-R(W)|RAM -> MPEG file (VOB format)
03 Clean up
03.01 video edge noise
03.02 interlace
03.03 inverse telecine
03.04 black level
03.05 trim
03.06 audio
04 Encoding
04.01 real
04.02 MPEG-1/2
04.03 QuickTime .mov, MPEG-4 .mp4
04.04 Windows Media 9 .wmv
04.04.01 MPEG-2 -> WMV
04.04.02 DV -> WMV
05 Delivery
05.01 streaming .rm
05.02 streaming MPEG
05.03 download .rm, .mpg, .mov, .mwv
05.04 Access control
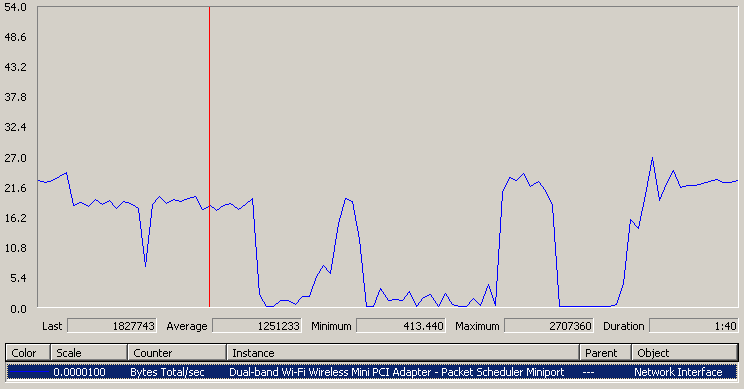
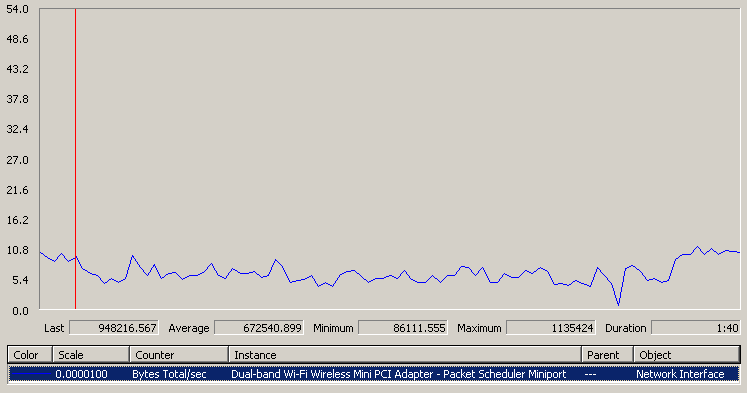
06 Bandwidth
06.01 GigE
06.02 100Mbps
06.03 802.11a
06.04 802.11g
There are many ways to deliver the digital video. Think about some of the questions below and use the diagram to decide what route is best for you.
There are many advantages/disadvantages of each method. The flowchart use special consideration criteria that is not changable to narrow down the choice for you quickly. You can find comparison studies and marketing info on vendor's websites if you want to know more.
If you have other restrictions, you may have to sacrific some factors and use an alternative.
miniDV? VHS tape (not copyprotected)? Laser Disc? DVD (not copy protected)?
the author gave me the file - what's the extension .mov, .rm, .mpg, .wmv?
Self-created? Public Domain? Got permission from copyright owner(s) already?
[ If it is a "non standard" format - PAL/SECAM instead of U.S. NTSC? 8mm/16mm film? consult your support people ]
Just students on campus? Off campus? All got broadband? Some only have modem access? General public and others in your discipline may be interested?
A comparison of different bandwidth is the end of this article.
click on thumbnail below get a popup of full size image
Some old documents that you may be interested also, they are outdated, but some background information probably still applies
Unless you already got the video file from the author or has it on digital tape (miniDV, or Digital 8, microDV, or DVD usually, it need to go from analog (e.g. VHS) to digital first.
[ If some people give you full size DV, DVCAM, DVCPro, DVCPro50, Digital S, or DVHS tape instead, consult your support person for those ]
You have several choices.
Hook up the VCR to
It doesn't matter which way to do it, you end up with either a miniDV tape, DVD+/-R(W) |RAM disc or directly becomes a DV or MPEG-1/2 file on your computer.
You just push PLAY on the VCR, and RECORD on the recording device.
There are some minor catches on the quality settings (SP or LP, 32 vs 48 bit audio, 384kbp or 256 kbps audio), use the highest setting when possible.
If you are not using one of the method to go from analog directly to a computer file, you have to get from digital tape/disc on your hard disk somehow.
Several possibilities again
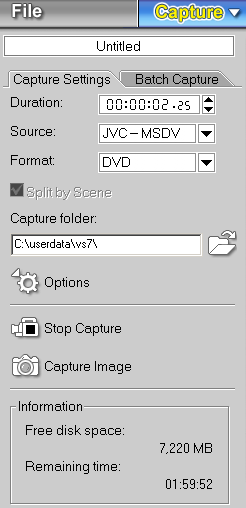
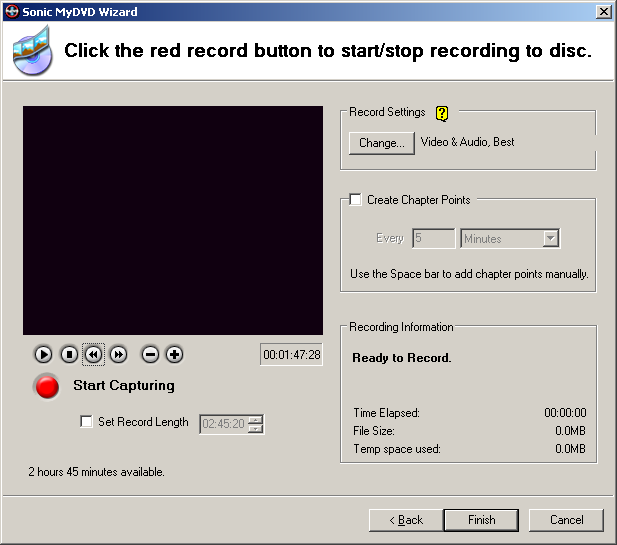
If you go straight from analog to MPEG2 on DVD+/-R(W)|RAM or hard disk, e.g. MyDVD 4.5.2 or VideoStudio 6/7, you don't need to transfer file.
VideoStudio 7 direct to MPEG capture plugin

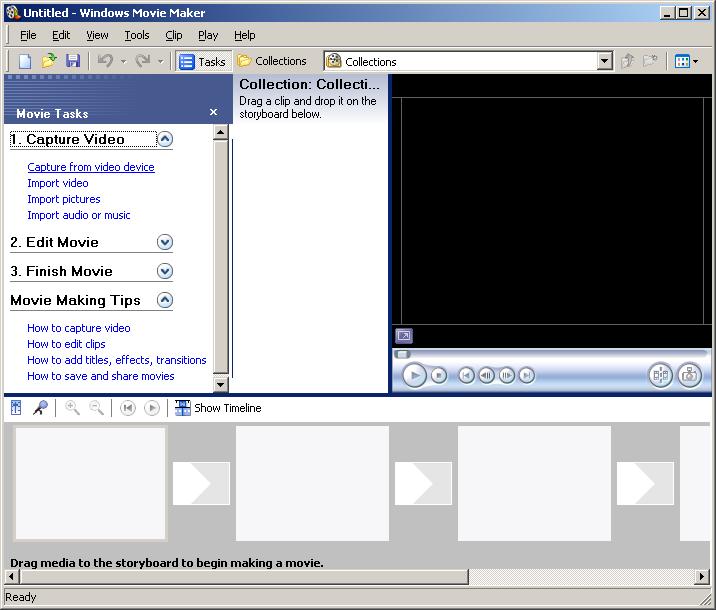
Micrsoft Movie Maker 2.0 Capture task
MyDVD 4.5.2 record to disk
 ]
]
Windows Media 9 Capture Utility

This is the most common and most flexible way.
You do this using one of the many video editing program, e.g.
Basically, you push record and you end up with a AVI file with your DV content.
Here are the catches


There are two ways to do this.

The video will be in 1GB trunks, you have to combine them back into one big file.

Now you get either .avi or .mpg file. If you are lucky, you are ready to go. However, most of the time, the video need to be "cleaned". You can do it now or during encoding, depends on which software have the options you like the most.
Video:
Audio
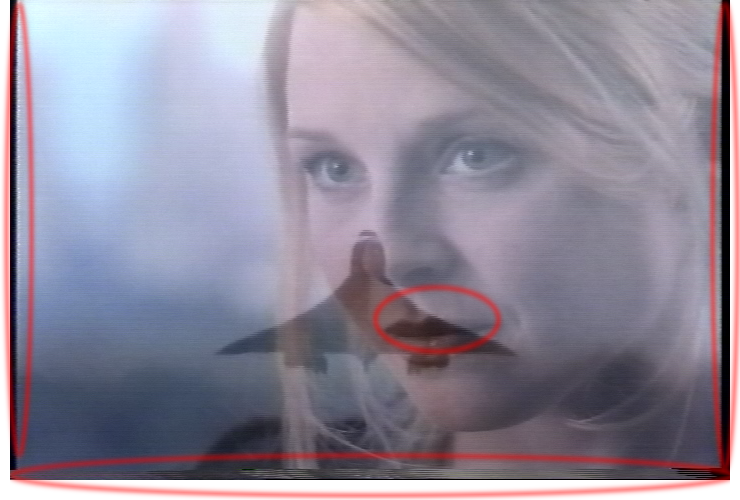
source from bad VHS deck, satellite and the like usually have problem with noise at the edges that are very annoying to the viewers. They don't show up in TV because of the overscan (10-20% are cut off)
e.g.
Note: the marked area in middle are due to interlace/telecone instead
to be discussed in teh next section
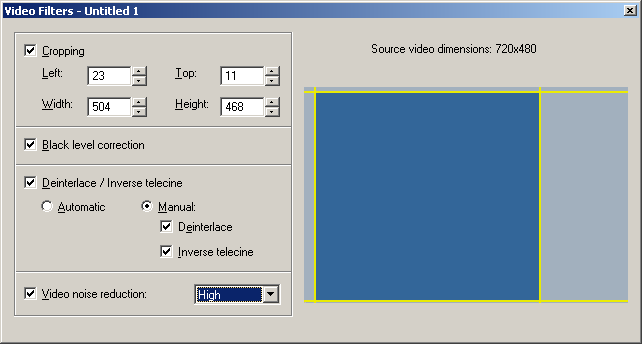
There are several ways to deal with the edge noise


Unless the original is a progressive source, deinterlace the video.
Pick the method that looks best. Becareful about some scheme double the data rate (ToDo: how to test the effect, they still plays fine)
Here are the choice in tmpgenc, available algorithms differ from program
to program

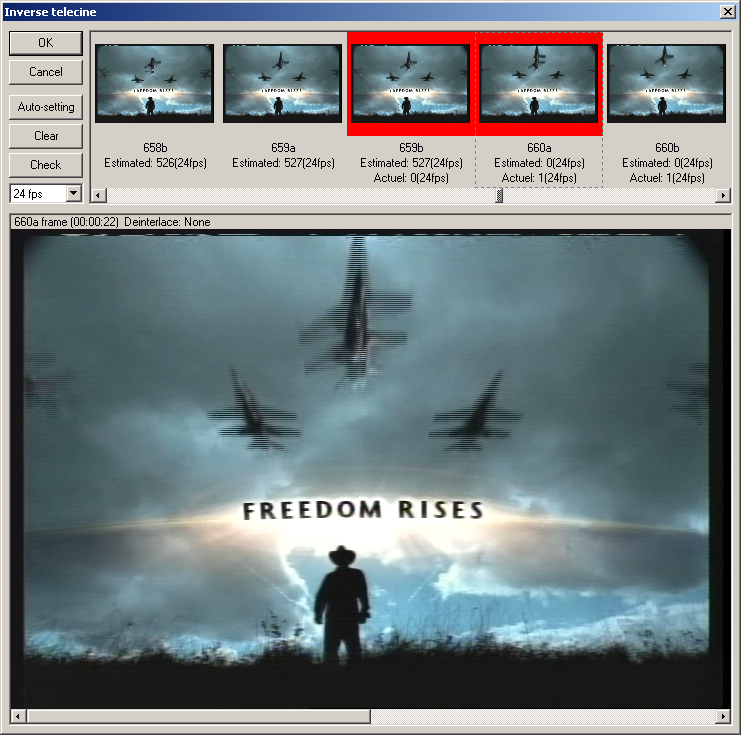
If your original is from film, most likely it is 24fps and have been 3:2 pull down to 30fps 60 fields. Now you have to inverse telecine it back to 24fps.
The UI in tmpgenc looks like this
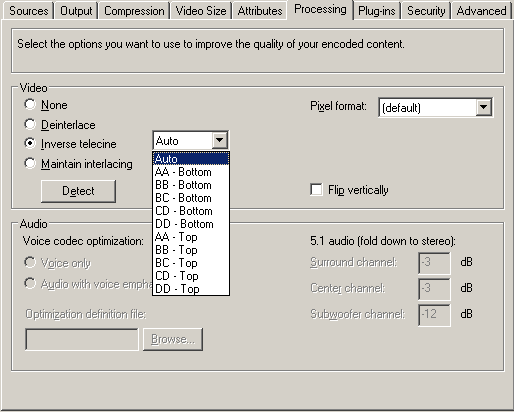
Windows Media Encoder 9, use A,B,C,D naming convention, you will have look
up some reference on how those works
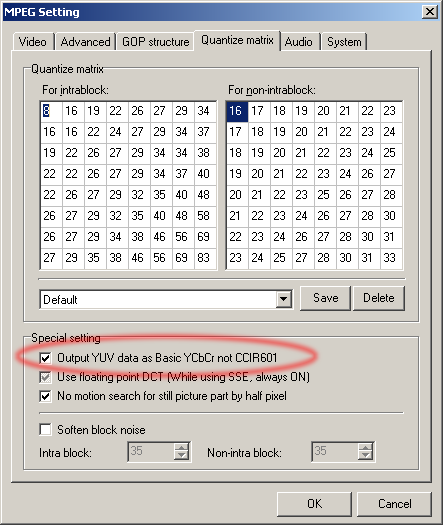
Because the way DV handle color, to optimize the video's black, sometimes you have to change the settings for processing if it is not automatically take into account.
The toggle for DV in tmpgenc is in Special setting.
In Helix, under video filter (To Do: check doc, I think that's the
same thing)
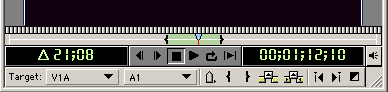
It is 25Mbps for DV or usually 4-6 Mbps for MPEG-2, trim the part you don't need..
The shortcut keys are handy here (I and O for Premiere,
F3 and F4 for Video Studio)
It is harder to use just numbers like Media Encoder
9
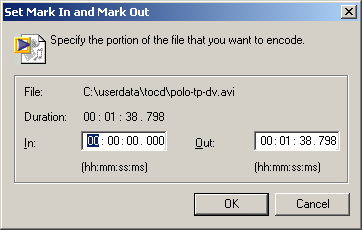
It is best if the program you use have audio wavefront display, it is must easier to trim sometimes. low end consumer product like VideoStudio doesnt' have that feature (ToDo: what's the shortcut key, if any, to mark in/out in tmpgenc?)
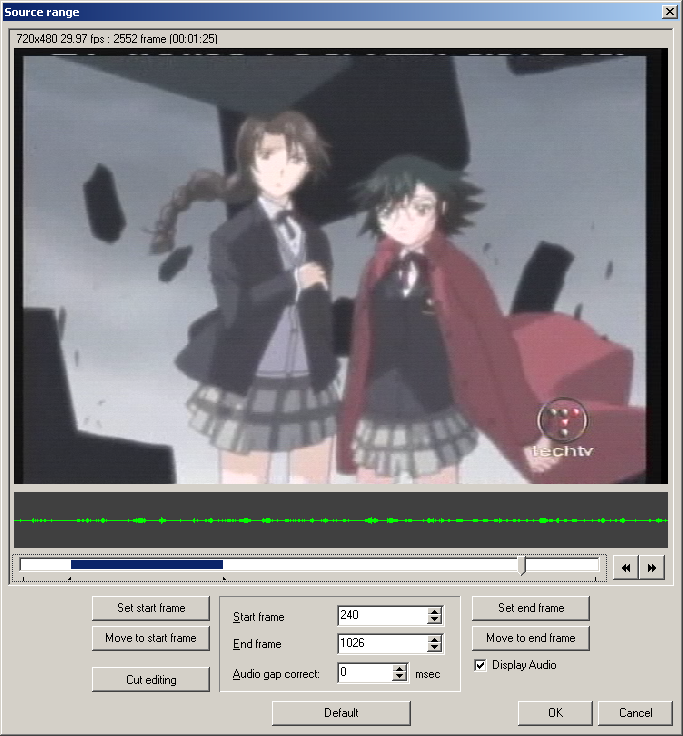
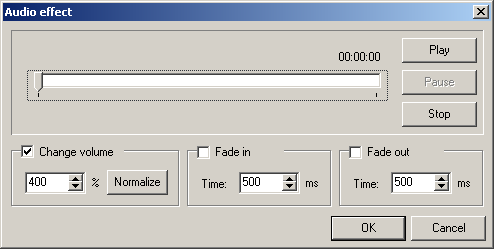
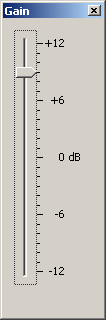
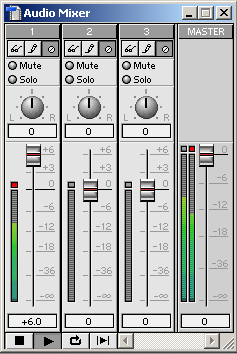
Some of the source's audio is low in volume. The ThinkPad speakers are not very powerful, try to maximize the audio. Best if there is auto normalization. If not, usually it is no more than 300-400% boast or +12 dB.
In tmpg, use change volume
In Helix, use audio gain; Premiere is audio mixer
(ToDo: check whether DirectX equalizer transform plugins work or not in wme)
![]()
Finally, we got a clean video we can use. You can then convert the .AVI or .MPG to a deliverable. (.MPG actually can go straight to IPTV if that's what you want (ToDo: make sure renamed/merged .VOB works) )
The common formats are
(ToDo: AOL licensed On2 VP6, the spec looks good, check license whether it will become open source like VP3)
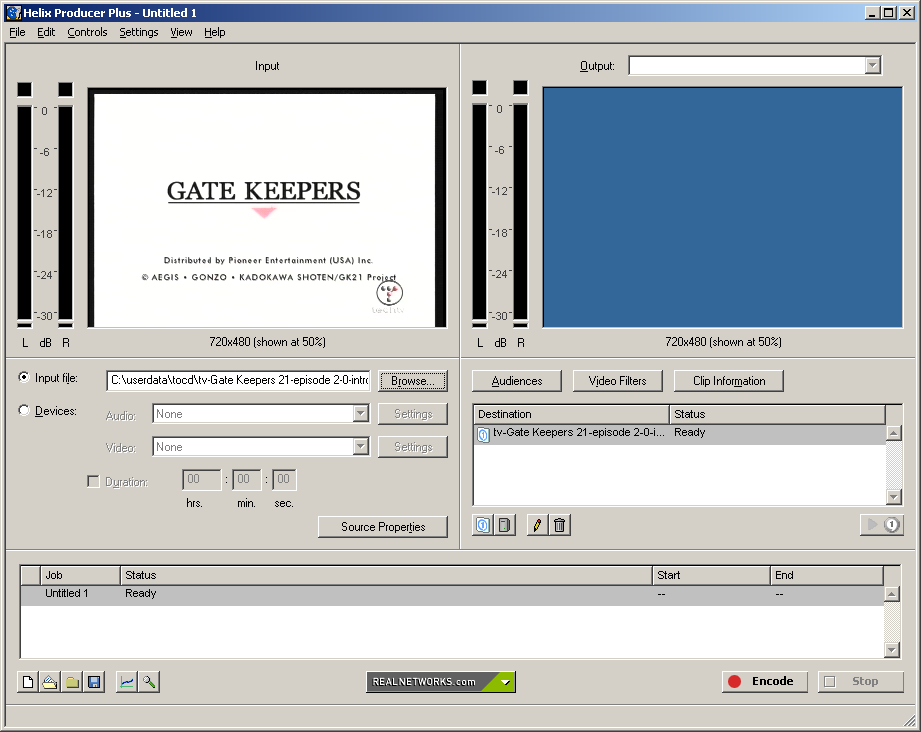
It is best to use Helix Producer rather than the one internal to your video editor.
You have to decide how many different bandwidth to accomodate different users in real.
(ToDo: check wmenc and IPTV on how to set multistream and multi bitrate MPEG)
Don't forget to add clipinfo
and hit encode, it is about 4x realtime on R40.
If you start with a DV-AVI file
You don't need this step if you capture directly to MPEG with DVD+/-R(W)|RAM, other hardware like Canopus Amber, or software like Video Studio 7.0, MyDVD 4.52
Adobe MPEG Encoder v1.1 main page
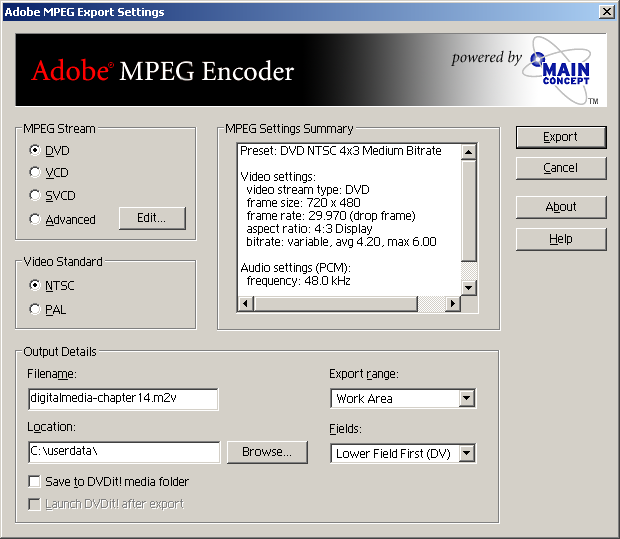
If you start with a DV-AVI file
to do the conversion

Convert from DV to WMV is eaiser than from MPEG-2 to WMV.
There are at least 3 ways to do the later.
You need the "right" decoder installed.
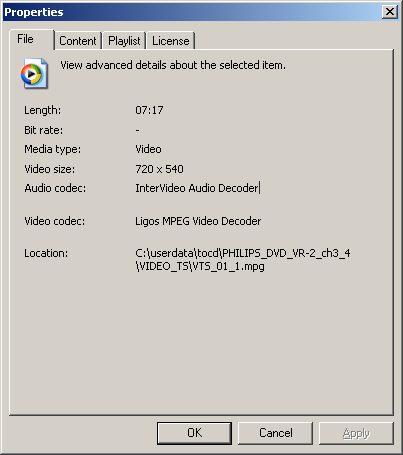
Play your MPEG in Windows Media Player and check the property page.
Doesn't work
Video decoder: Ligos
Audio decoder: InterVideo (ToDo: 4.0, have not tested with 5.0 yet)
1st pass work, but choked on audio codec in 2nd pass
Video decoder: InterVideo
Audio decoder: InterVideo
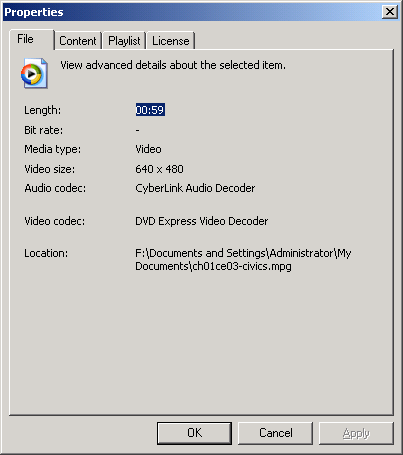
Tested to work
Video decoder: DVD Express (ToDo: probably 5.0 something, do not have 6.x,
try get a disc from Aptiva to try)
Audio decoder: CyberLink (ToDo: 3.0, got 4.0 somewhere, don't have 5.0)
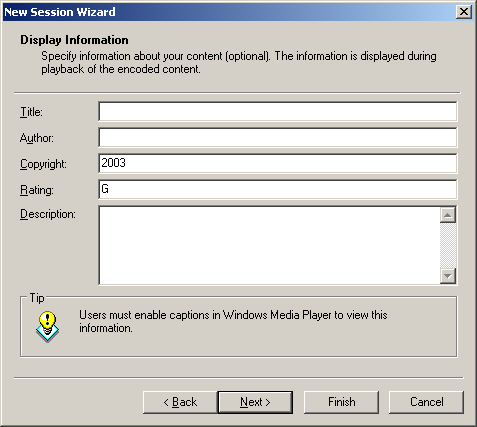
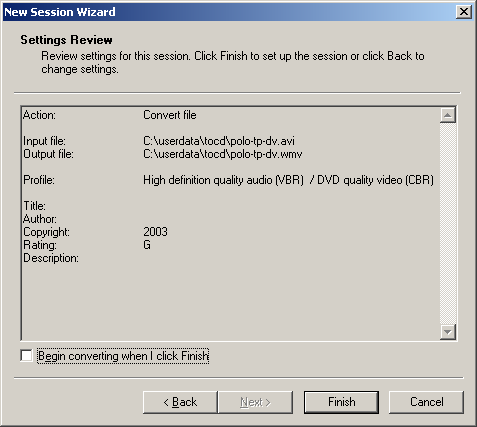
Pretty much just go through the wizard.
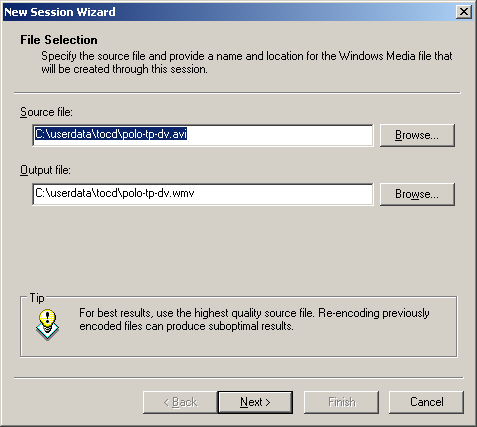
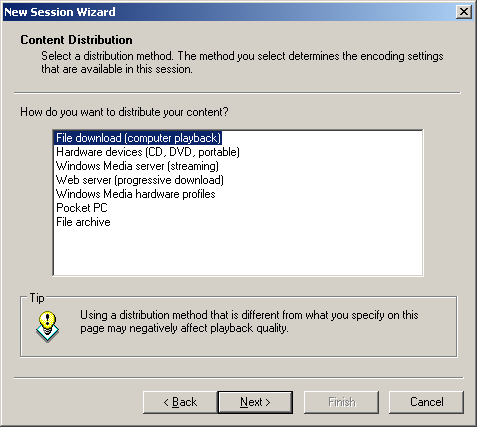
you can change the details of this setting latter
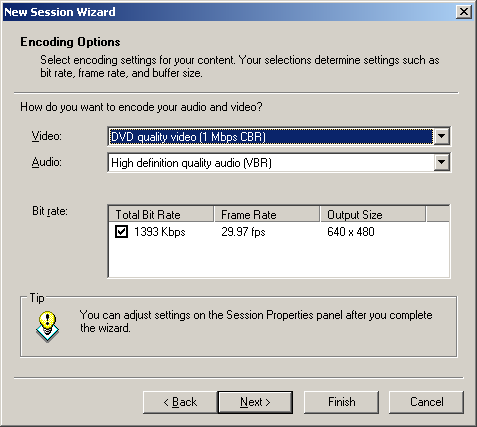
Here's where you fine tone the compression
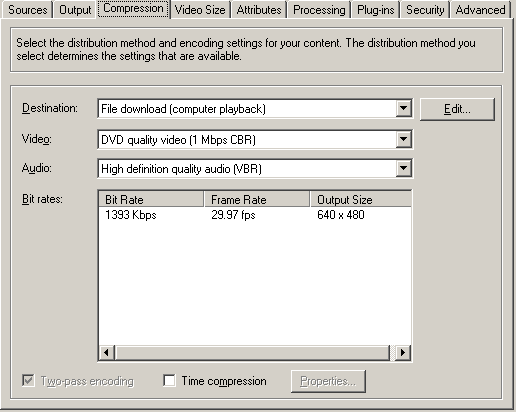
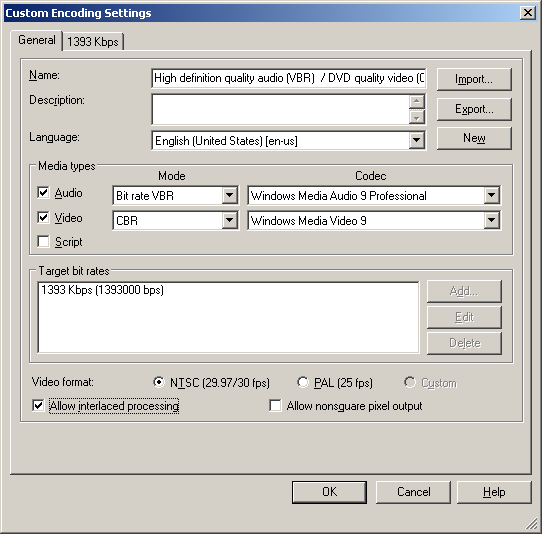
you have to decide whether to keep the rectangle pixel 720x480 or convert to square pixel 4:3 640x480
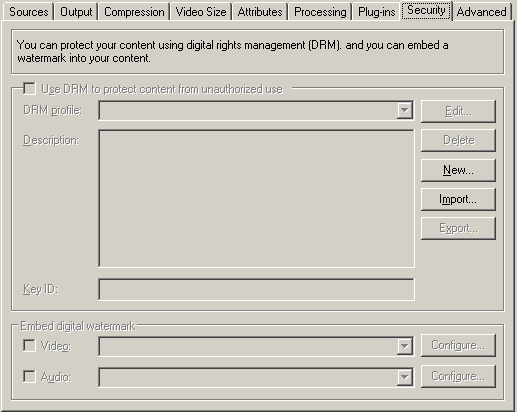
and DRM that you have to have your service provider to perform that.
remember it is a 2 pass process


you need to do two things
1. put the .rm file in \\netmeeting\rtsp\departmenname
2. create a metafile .rm|.ram/.rpm (depends on whether it play outside/standalone or embedded in a webpage) or .smil (if it is a complex presentation) on \\acfiles\www-home that points to the file like
rtsp://real.wfu.edu/departmentname/videofilename.rm
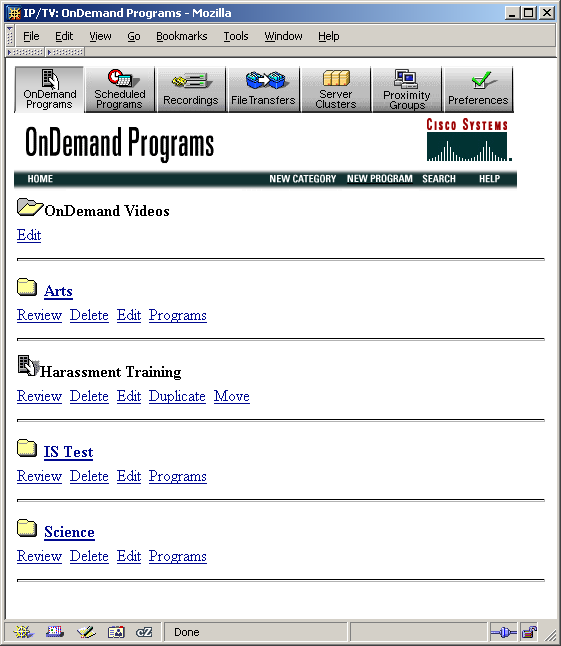
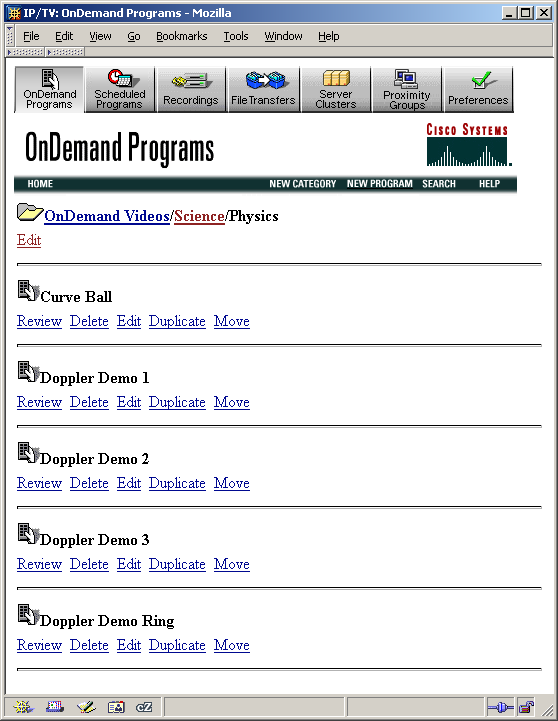
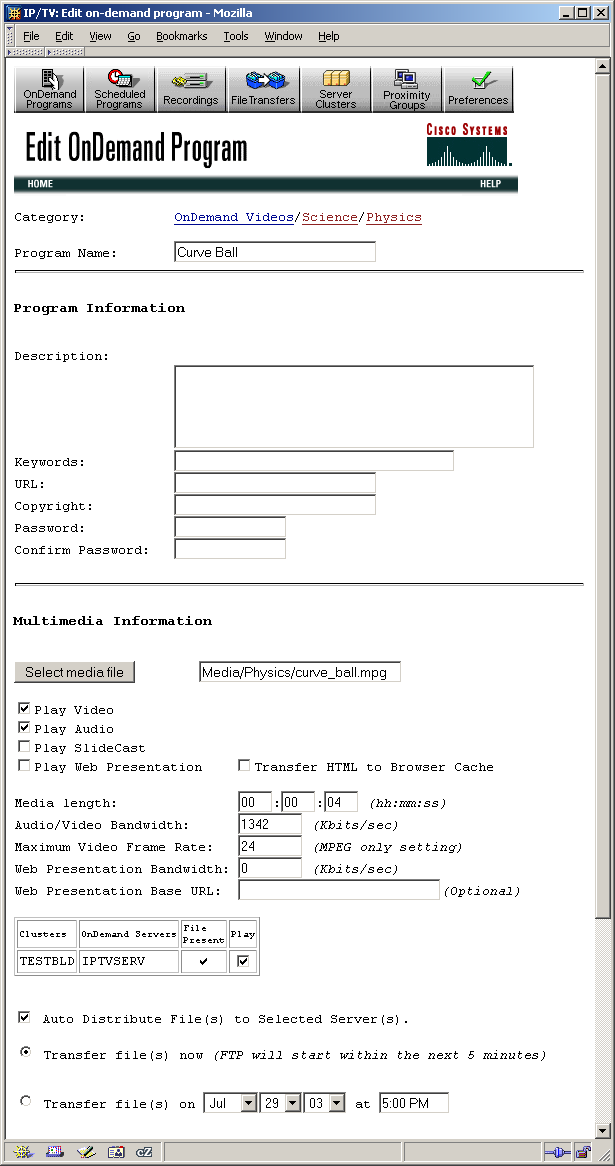
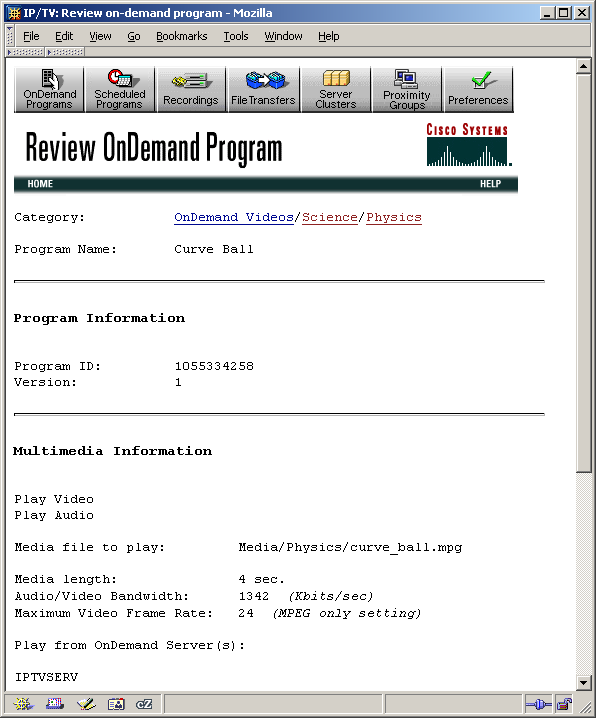
IPTV is the replacment for IBM VideoCharger and Concurrent MediaHawk for streaming MPEG-1 and MPEG-2 contents.
1. put the .mpg on \\iptvserv
2. configure the file for delivery via the webpage control panel
you can put the files for download on
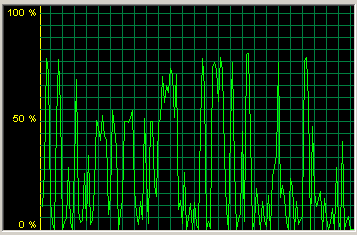
798MB test file
ftp ~ 42 seconds (19.56MB/s)
http ~ a minute something

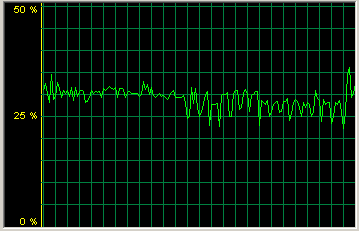
ftp 3 min 23 sec, avg 32132 Kbps (4016.520 KBps)
smb 3 min 36 sec
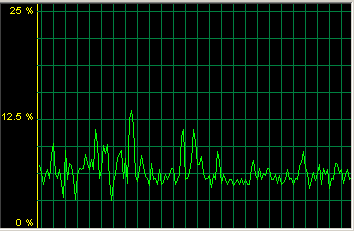
http 19 min 25 sec (693.5KB/sec)
ftp ~ 9 min, 1.x MB/s
http ~ 25 min, 600KB/s
ftp 12 min 30 seconds, 1117.24Kbytes/sec
http 25 min, 550 KB/s